ユーザーの追加方法
「 さくらのVPS for Windows Server 」でユーザーを追加する方法です。
Windows Server 2012 R2
デスクトップ画面から「スタート」ボタンをクリックします。
「スタート」メニューの中にある「コントロールパネル」をクリックします。
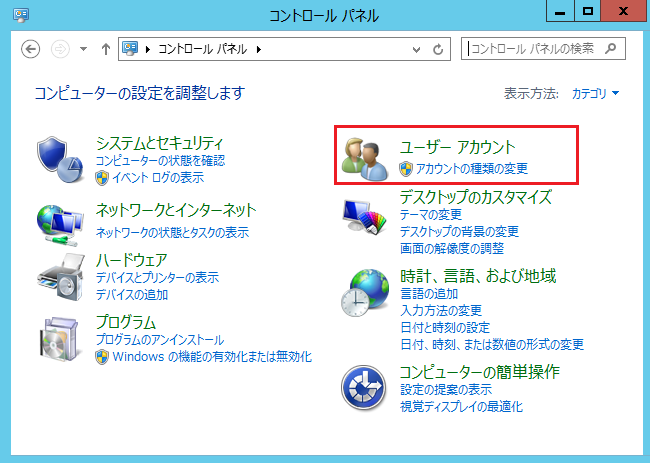
「コントロールパネル」メニューの中にある「ユーザーアカウント」をクリックします。
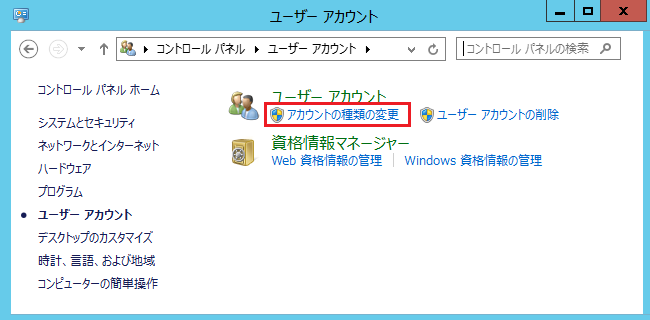
「ユーザーアカウント」メニューの中にある「アカウント種類の変更」をクリックします。
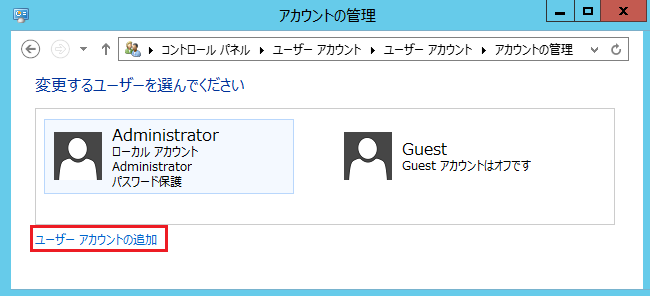
「ユーザーアカウントの追加」をクリックします。
追加するユーザーの「ユーザー名」「パスワード」と必要に応じて「パスワードのヒント」を入力し、「次へ」をクリックします。
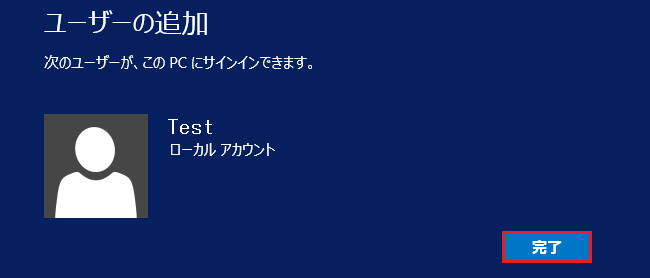
新しいユーザーアカウントが作成されたら「完了」をクリックします。
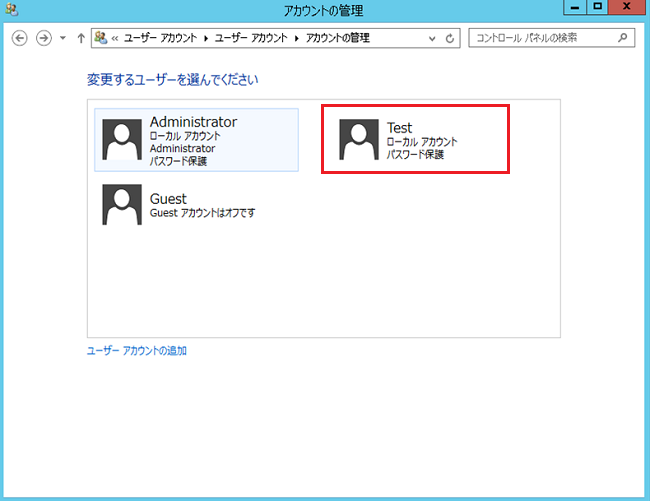
新しいユーザーが「標準アカウント」として一覧に表示されます。
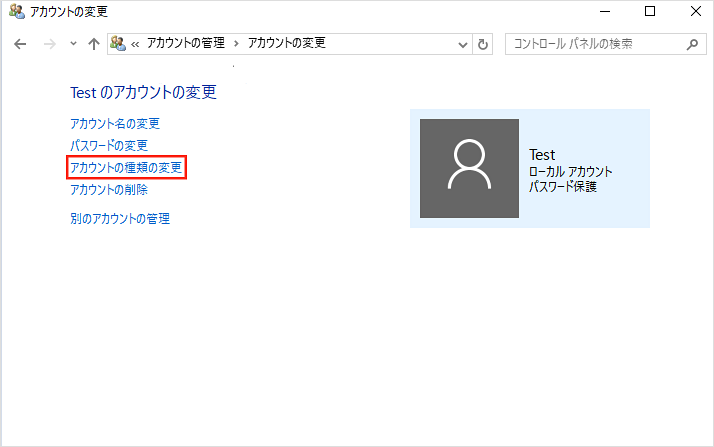
アカウントの種類を「管理者」に変更したい場合は、追加されたユーザーをクリックします。
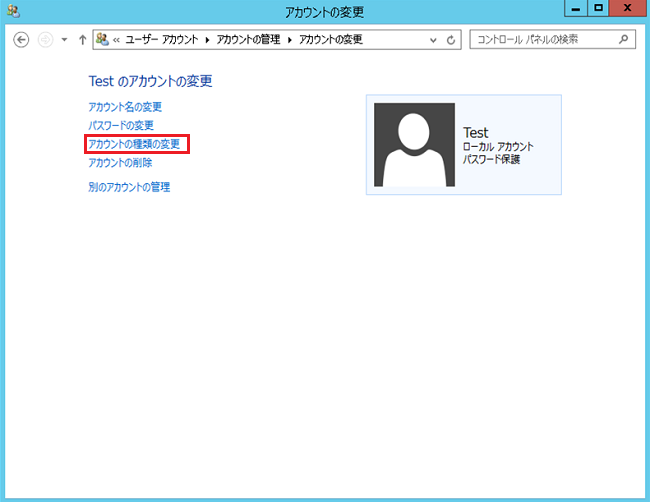
「アカウントの種類の変更」をクリックします。
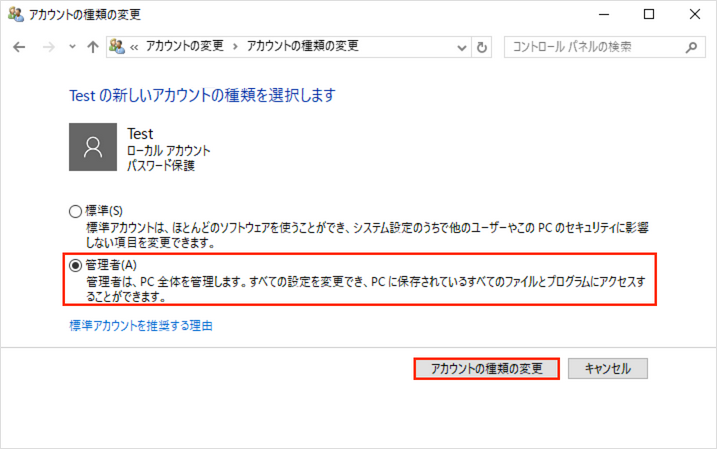
「管理者」を選択し、「アカウントの種類の変更」をクリックします。
Windows Server 2016
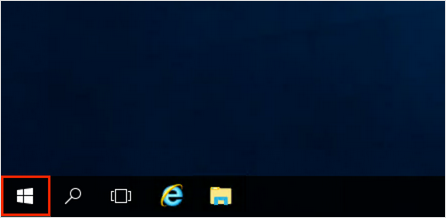
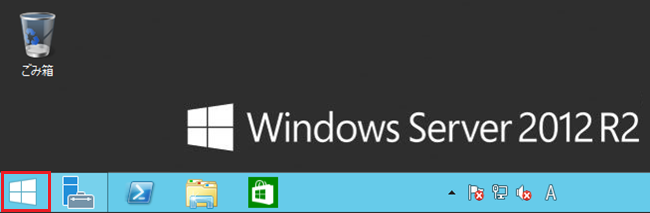
デスクトップ画面から「スタート」ボタンをクリックします。
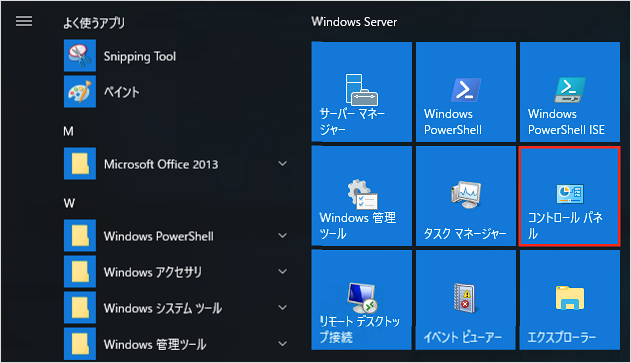
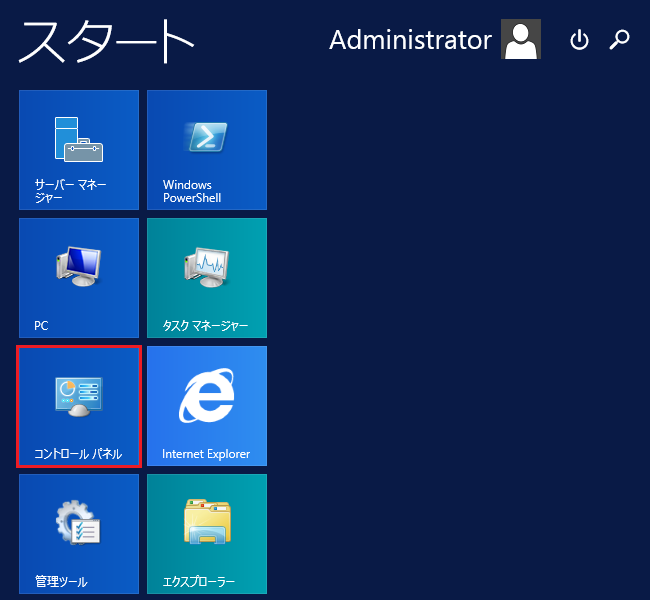
「スタート」メニューの中にある「コントロールパネル」をクリックします。
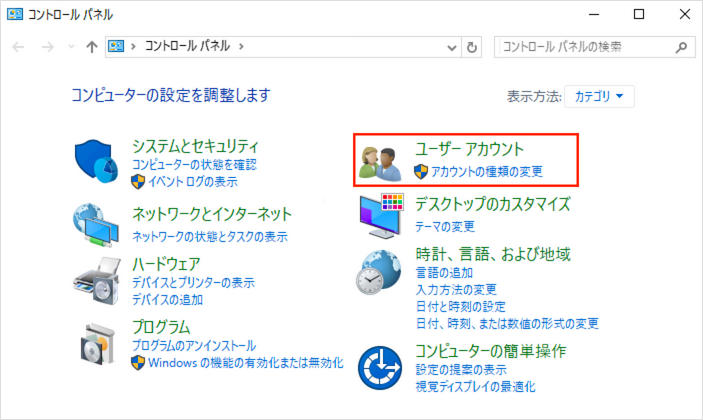
「コントロールパネル」メニューの中にある「ユーザーアカウント」をクリックします。
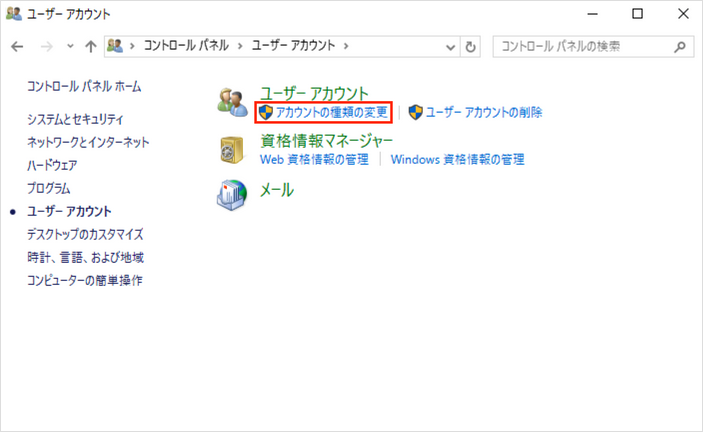
「ユーザーアカウント」メニューの中にある「アカウント種類の変更」をクリックします。
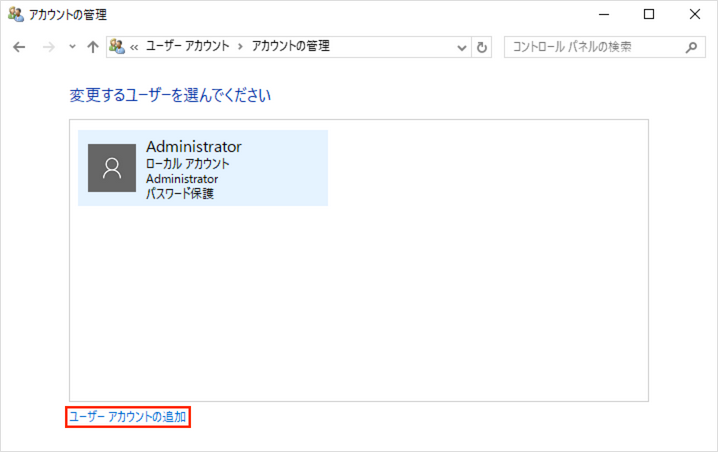
「ユーザーアカウントの追加」をクリックします。
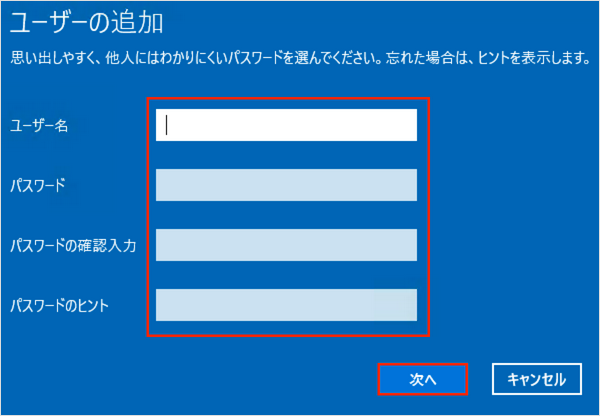
追加するユーザーの「ユーザー名」「パスワード」と必要に応じて「パスワードのヒント」を入力し、「次へ」をクリックします。

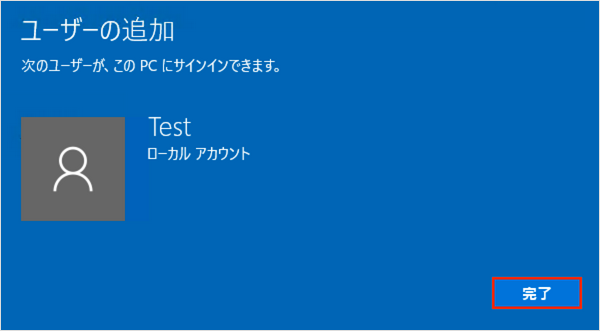
新しいユーザーアカウントが作成されたら「完了」をクリックします。
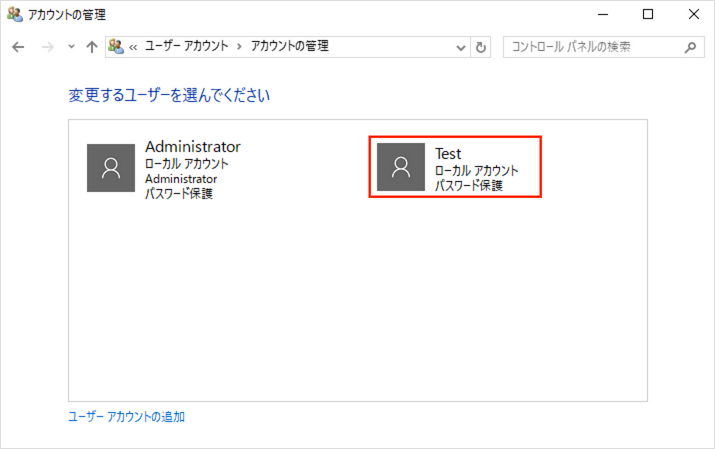
新しいユーザーが「標準アカウント」として一覧に表示されます。
アカウントの種類を「管理者」に変更したい場合は、追加されたユーザーをクリックします。
「アカウントの種類の変更」をクリックします。
「管理者」を選択し、「アカウントの種類の変更」をクリックします。
