CentOS 6.8
注意
本ドキュメントに記載のOSは2020年12月1日をもって提供終了しました。
[更新:2020年5月21日]
本手順書の対象は標準OSの CentOS 6.8 です。カスタムOSにてインストールされた CentOS 6.8 は対象外となります。
初期提供時の仮想ディスクパーティション構成を変更している場合、本手順書は対応しませんのでご注意ください。
本手順書で想定している仮想サーバのスペックは以下の通りです。実際のスペックは、お客様の実環境に合わせてお読み替えください。
– |
プラン |
仮想CPU |
仮想メモリ容量 |
仮想ディスク容量 |
|---|---|---|---|---|
スケールアップ前 |
SSD 1G |
2CPU |
1024MB |
30GiB |
スケールアップ後 |
SSD 4G |
4CPU |
4096MB |
100GiB |
スケールアップを実施する
スケールアップは「コントロールパネル」からおこないます。
手順の詳細については、 スケールアップ をご覧ください。
ヒント
スケールアップ実施の前に、重要なデータのバックアップ取得をお勧めいたします。
ディスク拡張の準備作業
サーバを起動、ログイン
スケールアップ完了後、コントロールパネルの「起動」を押してサーバを起動します。
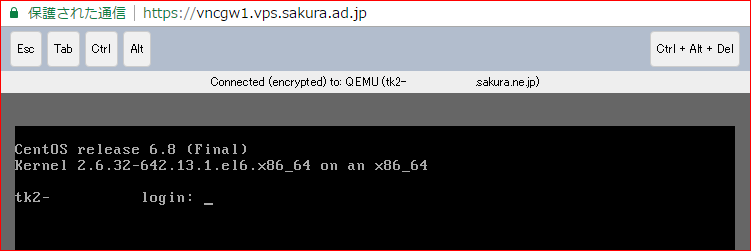
コントロールパネル上にある「コンソール」→「VNCコンソール」を使い、サーバが正常に起動できたことを確認します。
VNCコンソールまたはSSH経由でサーバへログインします。ログイン後はrootユーザーへ切り替えます。
必要なパッケージをインストール
ディスクの状態の確認および拡張には、gdisk という名前のパッケージが必要です。もしインストールされていなければ、あらかじめインストールしておきます。
# rpm -q gdisk
package gdisk is not installed

# yum -y install gdisk
ディスクを拡張する
ディスクの状態を確認
現在のディスクの状況を確認します。
# gdisk -l /dev/vda

GPT fdisk (gdisk) version 0.8.10
Partition table scan:
  MBR: protective
  BSD: not present
  APM: not present
  GPT: present
Found valid GPT with protective MBR; using GPT.
Disk /dev/vda: 209715200 sectors, 100.0 GiB
Logical sector size: 512 bytes
Disk identifier (GUID): 82754430-0D41-4DC7-A46F-5FCF84C9DB5B
Partition table holds up to 128 entries
First usable sector is 34, last usable sector is 62914526
Partitions will be aligned on 2048-sector boundaries
Total free space is 2014 sectors (1007.0 KiB)
Number  Start (sector)    End (sector)  Size       Code  Name
   1            2048          514047   250.0 MiB   8300  Linux filesystem
   2          514048         4708351   2.0 GiB     8200  Linux swap
   3         4708352        62914526   27.8 GiB    8300  Linux filesystem
# lsblk
NAME   MAJ:MIN RM  SIZE RO TYPE MOUNTPOINT
vda    252:0    0  100G  0 disk
├─vda1 252:1    0  250M  0 part /boot
├─vda2 252:2    0    2G  0 part [SWAP]
└─vda3 252:3    0 27.8G  0 part /
sr0     11:0    1 1024M  0 rom
gdisk コマンドの結果から /dev/vda のサイズは 100GB に拡張されたのが分かります。
しかし、OS 側からの認識状況を確認しますと、3つのパーティションとして認識している容量の合計は 30GB です。
また、lsblk コマンドの結果から、標準OSでインストールしたパーティション「vda1」「vda2」「vda3」の3つが確認できます。
パーティションをソートする
先ほどの gdisk コマンドの実行結果を見ますと、Total free space (合計空き容量)が正しく認識されていないことが分かります。
「2014 sectors (1007.0 KiB)」の表示、つまり空き容量が 1MB 程度ですが、本来は70GB あります。
これを整理(ソート)して正しい情報にするには、以下のコマンドを実行します。
# sgdisk -s /dev/vda

Warning: The kernel is still using the old partition table.
The new table will be used at the next reboot.
The operation has completed successfully.
実行後、もう一度 gdisk コマンドでディスクの状況を確認します。
# gdisk -l /dev/vda

GPT fdisk (gdisk) version 0.8.10
Partition table scan:
  MBR: protective
  BSD: not present
  APM: not present
  GPT: present
Found valid GPT with protective MBR; using GPT.
Disk /dev/vda: 209715200 sectors, 100.0 GiB
Logical sector size: 512 bytes
Disk identifier (GUID): 82754430-0D41-4DC7-A46F-5FCF84C9DB5B
Partition table holds up to 128 entries
First usable sector is 34, last usable sector is 209715166
Partitions will be aligned on 2048-sector boundaries
Total free space is 146802654 sectors (70.0 GiB)
Number  Start (sector)    End (sector)  Size       Code  Name
   1            2048          514047   250.0 MiB   8300  Linux filesystem
   2          514048         4708351   2.0 GiB     8200  Linux swap
   3         4708352        62914526   27.8 GiB    8300  Linux filesystem
今度は Total free space が増えたのが分かります。
「146802654 sectors (70.0 GiB)」と表示されており、正常に空き容量を認識しました。
新しいパーティションを作成する
スケールアップにより増えたディスク容量を OS 認識ができましたので、gdisk コマンドで新しいディスクパーティションを作ります。
# gdisk /dev/vda

GPT fdisk (gdisk) version 0.8.10
Partition table scan:
  MBR: protective
  BSD: not present
  APM: not present
  GPT: present

Found valid GPT with protective MBR; using GPT.

*[ n ] コマンドを入力します。新しいパーティションを作るという意味です。*
Command (? for help): n

*Partition number はデフォルトの [ 4 ] にしますので、そのまま [ Enter ] キーを押します。*
Partition number (4-128, default 4):

*Fisrt sector/Last sector もデフォルトの数値にするので、そのまま [ Enter ] キーを押します。*
First sector (34-209715166, default = 62914560) or {+-}size{KMGTP}:
Last sector (62914560-209715166, default = 209715166) or {+-}size{KMGTP}:

*Partition Type もデフォルトの [ Linux filesystem ] で問題がなければ、そのまま [ Enter ] キーを押します。*
Current type is 'Linux filesystem'
Hex code or GUID (L to show codes, Enter = 8300):
Changed type of partition to 'Linux filesystem'

*作成完了したので、 [ p ] コマンドでパーティションテーブルの確認をします。*
Command (? for help): p
Disk /dev/vda: 209715200 sectors, 100.0 GiB
Logical sector size: 512 bytes
Disk identifier (GUID): 82754430-0D41-4DC7-A46F-5FCF84C9DB5B
Partition table holds up to 128 entries
First usable sector is 34, last usable sector is 209715166
Partitions will be aligned on 2048-sector boundaries
Total free space is 2047 sectors (1023.5 KiB)

*表示されている新しいパーティションテーブルにサイズなどの問題がないことを確認します。*
Number  Start (sector)    End (sector)  Size       Code  Name
   1            2048          514047   250.0 MiB   8300  Linux filesystem
   2          514048         4708351   2.0 GiB     8200  Linux swap
   3         4708352        62914526   27.8 GiB    8300  Linux filesystem
   4        62914560       209715166   70.0 GiB    8300  Linux filesystem

*問題がなければ [ w ] コマンドを入力します。*
Command (? for help): w
Final checks complete. About to write GPT data. THIS WILL OVERWRITE EXISTING
PARTITIONS!!

*もう一度確認をして問題がなければ [ y ]を入力して、 [ Enter ] キーを押します。*
*このコマンドを実行すると、ディスクの書き換えが発生するので、必ず確認した上で実行しましょう。*
Do you want to proceed? (Y/N): y
OK; writing new GUID partition table (GPT) to /dev/vda.
Warning: The kernel is still using the old partition table.
The new table will be used at the next reboot.
The operation has completed successfully.
ファイルシステムを作る
新規作成したパーティションを利用するには、フォーマットして、マウントする必要があります。
以降の例ではファイルシステムを ext4 形式でフォーマットし、 /data にマウントする手順を説明します。
まず、新しいディスクパーティションがOS上にデバイスとして認識されているか確認します。
# ls /dev/vda4

ls: cannot access /dev/vda4: No such file or directory
新しく作成した vda4 がデバイスとして認識されていない場合は、一度OSを再起動しましょう。
# reboot
再起動が困難な場合は、以下のコマンドで強制的に認識させることも可能です。
# partx -a /dev/vda
vda4 がOSに認識されたら、 mkfs.ext4 コマンドでフォーマットを実行します。
# mkfs.ext4 /dev/vda4

mke2fs 1.41.12 (17-May-2010)
Filesystem label=
OS type: Linux
Block size=4096 (log=2)
Fragment size=4096 (log=2)
Stride=0 blocks, Stripe width=0 blocks
4587520 inodes, 18350075 blocks
917503 blocks (5.00%) reserved for the super user
First data block=0
Maximum filesystem blocks=4294967296
560 block groups
32768 blocks per group, 32768 fragments per group
8192 inodes per group
Superblock backups stored on blocks:
    32768, 98304, 163840, 229376, 294912, 819200, 884736, 1605632, 2654208,
    4096000, 7962624, 11239424
Writing inode tables: done
Creating journal (32768 blocks): done
Writing superblocks and filesystem accounting information: done
This filesystem will be automatically checked every 23 mounts or
180 days, whichever comes first.  Use tune2fs -c or -i to override.
なお、この状態では作成したファイルシステムでは23カ月または180日たつと、自動的にファイルシステムのチェックが実行されます。
この間隔は tune2fs コマンドで調整できます。次の例はチェックを行わない指定です。
# tune2fs -c -1 -i 0 /dev/vda4
新しいディスクをマウントする
初期化した領域をディスクとして使うには、まずマウントポイントを作成します。
マウントポイントを作成したら、 /dev/vda4 を /data にマウントします。
# mkdir /data
# mount /dev/vda4 /data
それから、マウントが完了したかどうかを確認します。
# mount | grep vda4

/dev/vda4 on /data type ext4 (rw)
# lsblk

NAME   MAJ:MIN RM  SIZE RO TYPE MOUNTPOINT
vda    252:0    0  100G  0 disk
├─vda1 252:1    0  250M  0 part /boot
├─vda2 252:2    0    2G  0 part [SWAP]
├─vda3 252:3    0 27.8G  0 part /
└─vda4 252:4    0   70G  0 part /data
sr0     11:0    1 1024M  0 rom
70Gのサイズで /data にマウントされていることが確認できます。
最後にOSを再起動してもマウントできるように、 /etc/fstab に設定を追加します。
# id=$(blkid -o value -s UUID /dev/vda4)
# echo "UUID=${id} /data ext4 defaults 0 2" >> /etc/fstab