FortiGateの基本設定例2
[更新: 2026年6月22日]
1. 概要
本掲載は、VM起動後にお客様で必要となる初期設定に関する参考情報です。
弊社による検証データの一部を公開した記事掲載となります。参考までにご利用ください。
注釈
SI、要件定義、設計、開発・設定補助に関するサポートは、FortiGateVMのライセンスサービスに含まれません。上記、ご注意ください。
1.1 検証条件
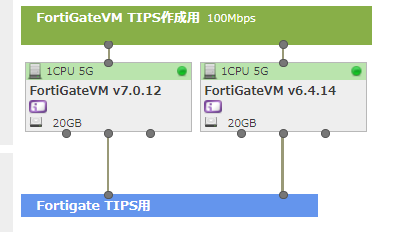
本掲載による構成は、後述のvrrpを予定するためルータ+スイッチを利用前提となります。
本掲載による事前検証は、さくらのクラウド環境により実施された内容です。
FortiGateは、GUIとCLIのサポートとなります。掲載はCLI、GUIを適宜使い分け掲載いたします。
本掲載により利用された検証環境のFortiOSは、両系ともに7.0.12です。
コマンドの一部は、<>記載により抽象化、強調記載を行います。お客様が入力を行う際は<>を削除、入力します。
1.2 環境構成図
FortiGateの基本設定例1 構成図から継続し解説します。
構成図
注釈
別途、同一のホスト環境へのVM収容を避けるためgroupタグを利用します。
2 システム設定に関する基本設定
本項目は、FortiGateVM(FortiOS)システム設定の一部を解説します。
注釈
本設定詳細は、メーカードキュメントを参照ください。
System
注釈
ベストプラクティス も合わせて確認ください。
2.1 ホスト設定
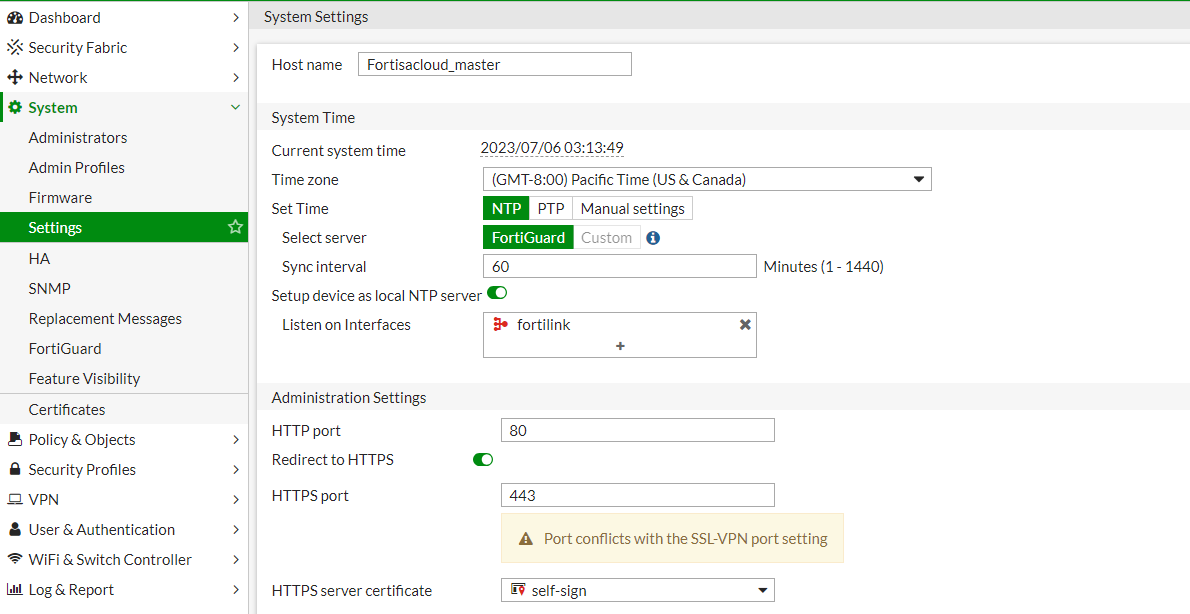
ホスト名を未設定の際は、ライセンスのシリアルNo(インポートファイル名)が表示されます。
変更する際は、下記のメニュー順に操作、host nameの項目より設定します。
System Settings 編集画面
System >>> Setting >>> System Settings >>> Host name
参考画面は、Fortisacloud_masterへ変更します。Host nameを入力後、Applyを入力します。
変更後の表示

注釈
host nameは、設定に下記の制限があります。
The host name may be up to 35 characters in length. It may include US-ASCII letters, numbers, hyphens, and underscores. Spaces and special characters are not allowed.
2.2 システム時間帯
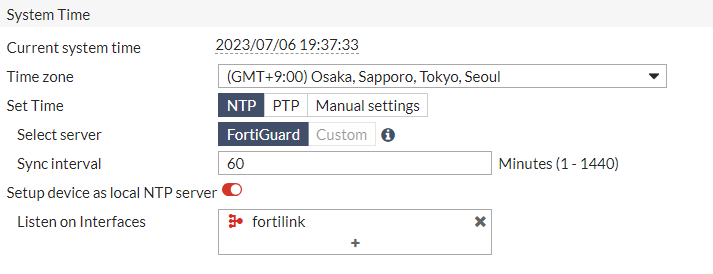
ログ、2FA(FortiToken)などの時刻表示に関係する重要な設定となります。
Time ZoneをJP Time(GMT-9:00)へ変更します。変更の際は下記のメニュー順に操作、設定画面を表示します。
System Time 編集画面
System >>> Setting >>> System Settings >>> System Time
Apply後にcurrent system timeは設定したTime Zone表示に変更されます。
2.3 管理アクセス設定
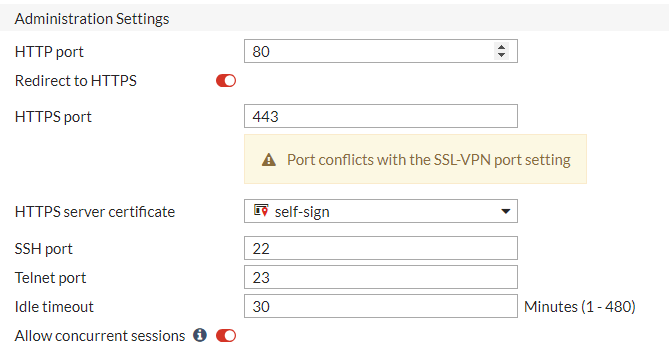
GUIによる管理画面アクセスを設定する項目です。変更の際は下記のメニュー順に操作、設定画面を表示します。
Administration Settings 編集画面
System >>> Setting >>> System Settings >>> Administration Settings
参考画面は、Idle timeoutにより待機 >>> 切断時間を標準設定の5分から30分に変更します。
注釈
管理者passwordに対するlock out timeなどの閾値設定は、CLI操作のみで変更可能です。
config system global の設定項目を参照ください。
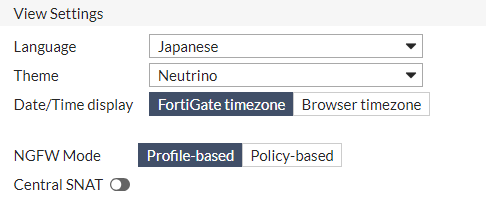
2.4 画面設定
GUIによる管理画面の表示を設定する項目です。変更の際は下記のメニュー順に操作、設定画面を表示します。
View Settings 編集画面
System >>> Setting >>> System Settings >>> View Settings
参考画面は表示言語を日本語、表示テーマをNeutrinoに変更します。
注意
以降の説明は、表示言語の設定に合わせて日本語名を基準に記載します。
注釈
CLIは英語表示のみお客様による設定、入力を除き日本語は表示されません。
3. CLI コマンド操作方法の補足
本項目は、機器のCLI操作に関する簡単な基本設定を説明、補足します。
注釈
OSバージョンに応じて記載内容、詳細が異なるケースがございます。詳細は FortiOS CLI reference を参照ください。
3.1 コマンドリスト表示
? を入力することでコマンドリストを表示します。
?入力画面
ortisacloud_master # <?>
config      Configure object.
get         Get dynamic and system information.
show        Show configuration.
diagnose    Diagnose facility.
execute     Execute static commands.
alias       Execute alias commands.
exit        Exit the CLI.
コマンドを途中まで入力 ? 実行をすると。後続に入力が有効なコマンドリストが表示されます。
show コマンド以降のリストを呼び出し
Fortisacloud_master # show <?>
alertemail             Alert email configuration.
antivirus              AntiVirus configuration.
application            Application control configuration.
authentication         authentication
dlp                    DLP configuration.
dnsfilter              DNS filter configuration.
dpdk                   FortiOS DPDK Helper configuration.
emailfilter            AntiSpam configuration.
endpoint-control       Endpoint control configuration.
extender-controller    FortiExtender controller configuration.
file-filter            file-filter
firewall               Firewall configuration.
ftp-proxy              FTP proxy configuration.
icap                   ICAP client configuration.
ips                    IPS configuration.
log                    Log configuration.
router                 Router configuration.
sctp-filter            SCTP filter configuration.
ssh-filter             SSH filter configuration.
switch-controller      External FortiSwitch configuration.
system                 System operation configuration.
user                   Authentication configuration.
videofilter            videofilter
voip                   VoIP configuration.
vpn                    VPN configuration.
waf                    Web Application Firewall configuration.
wanopt                 WAN optimization configuration.
web-proxy              Web proxy configuration.
webfilter              Web filter configuration.
wireless-controller    Wireless access point configuration.
full-configuration     show full configurationv
3.2 コマンドの入力補助
コマンドの途中でTABキーを入力により以降で有効なコマンドが入力されます。
再度TABキーを入力することで次に有効なコマンドが入力されます(A~順に入力されます)。
参考例
Fortisacloud_master # show full-<TABキー>
>>> Fortisacloud_master # show full-configuration
3.3 コマンド検索
LinuxOSコマンドなどの一部共通コマンドの利用、実行が可能です。
参考例 検索例
Fortisacloud_master # show full-configuration | grep router
    edit "all_routers"
    set router enable
      config router access-list
      config router access-list6
      config router aspath-list
      config router prefix-list
      config router prefix-list6
      config router key-chain
      config router community-list
      config router route-map
      config router rip
      config router ripng
      config router static
      config router policy
      config router policy6
      config router static6
参考例 ping
FGVM1VTM20001321_SB # execute ping 0.0.0.0
PING 0.0.0.0 (0.0.0.0): 56 data bytes
64 bytes from 127.0.0.1: icmp_seq=0 ttl=255 time=0.0 ms
64 bytes from 127.0.0.1: icmp_seq=1 ttl=255 time=0.0 ms
64 bytes from 127.0.0.1: icmp_seq=2 ttl=255 time=0.0 ms
64 bytes from 127.0.0.1: icmp_seq=3 ttl=255 time=0.0 ms
64 bytes from 127.0.0.1: icmp_seq=4 ttl=255 time=0.1 ms

--- 0.0.0.0 ping statistics ---
5 packets transmitted, 5 packets received, 0% packet loss
round-trip min/avg/max = 0.0/0.0/0.1 ms
注釈
コマンドは、下記の通り省略が可能です。詳細はメーカードキュメント CLI basics を参照ください。
You can abbreviate words in the command line to their smallest number of non-ambiguous characters.
3.4 CLIコマンドについて補足
一部設定は、初期状態の標準設定値では表示されない設定項目、CLIにのみ設定可能な項目があります。
上記を確認する際は show full-configuration show full コマンドを入力します。
4. その他の補足
その他の基本的な設定に関する簡単な基本設定を説明、補足します。
4.1 機能表示
表示機能設定によりGUI上に表示される機能は制限がされた状態です。
必要に応じて、下記のメニュー順に操作、設定変更画面を表示します。
表示機能設定画面
システム >>> 表示機能設定
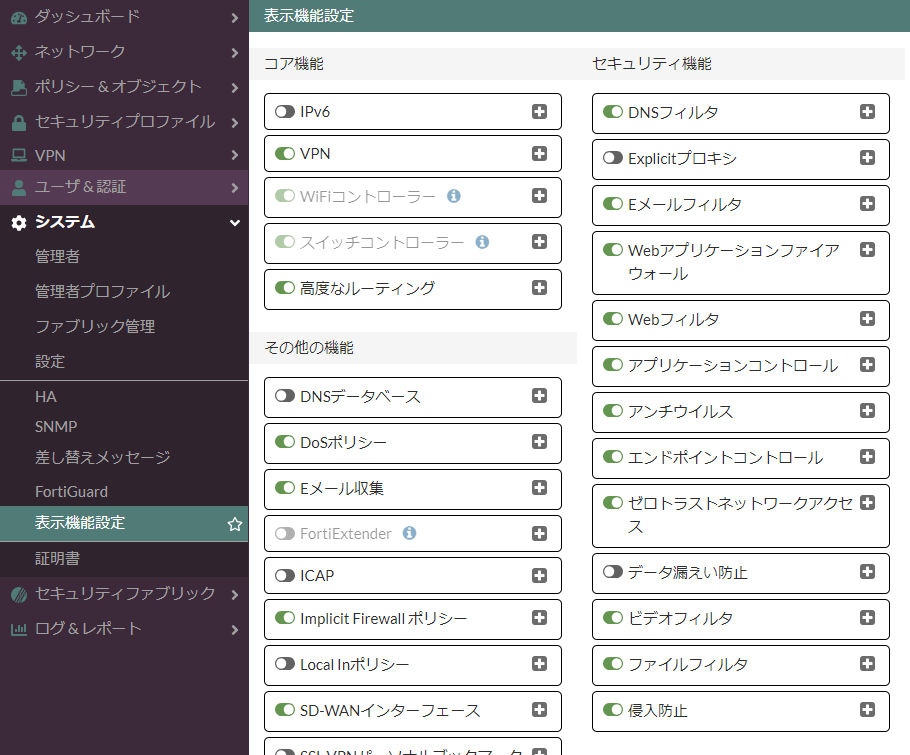
注釈
その他の設定値などにより変更後も非表示となる項目があります。
4.2 FortiOS 7以降のログレポートについて
7系以降からForti OSのログレポートは、下記の条件が必要となります。
FortiGate Cloudの利用
FortiAnalyzerの利用
syslog serverの利用
FortiGateVMへのディスク追加
FortiGate Cloudを利用する際は、FortiOSのCLI操作によりFortiGate Cloudアカウントの登録が必要となります。
注釈
FortiGate Cloudは、無償、有償と利用される内容によりサポート、提供内容が異なります(FortiGate Cloudの無償版利用に弊社サポートはありません)。
重要
FortiOS バージョンによりレポート機能を利用するための構成が異なります。利用前にメーカードキュメント(バージョン毎) Log and Report 項目を参照ください。
4.3 FortiTokenの利用
FortiGateVM ライセンスは、無償のFortiTokenライセンスが付帯されます(2ライセンス分)。
2ライセンス以上を利用する際は、別途ライセンスの購入と利用するFortigateへの登録が必要です。
FortiToken画面

注釈
評価ライセンスに於いても、同様に2ライセンスが付帯されます。
4.4 工場出荷状態への初期化
機器設定を初期化する際は、初期化コマンドを実行します。