アカウントを超えてサーバのコピーを行う手順
[更新: 2025年10月30日]
「さくらのクラウド」のアカウント間でサーバコピーする際の手順をご説明します。
1. 概要
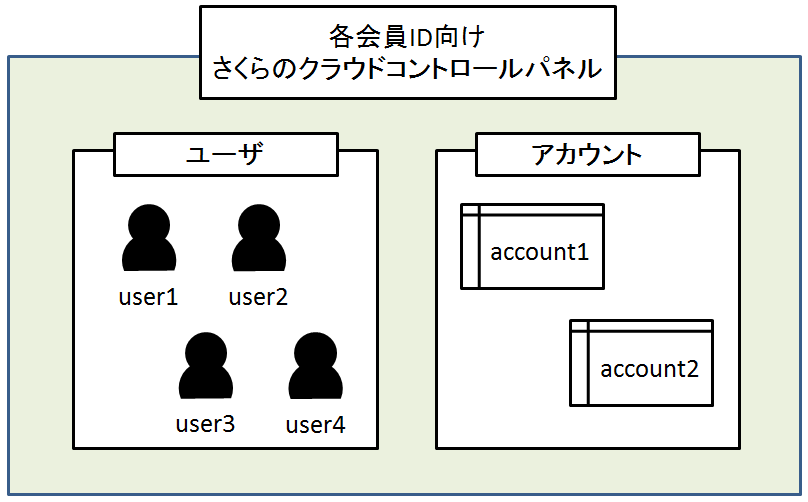
さくらのクラウドのコントロールパネルでは、会員IDのほかに
コントロールパネルへのログイン認証の単位となる「ユーザ」
リソースの作業空間となる「アカウント」
の概念が存在します。
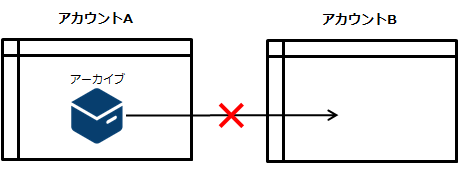
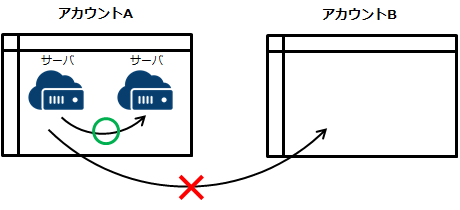
このうちリソースの作業空間単位であるアカウントとアカウントの間では、サーバをクローンしたり、アーカイブを共有したりすることができません。そのため、さくらのクラウドの機能の範囲では、アカウントを超えたサーバのコピーを行うことができません。
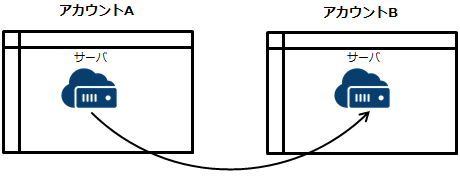
本記事では、rescueディスクでサーバをブートし、ddコマンドを使用することで、アカウントを超えてサーバをコピーする手順について解説致します。
2. 作業手順
作業は以下の手順で実施します。
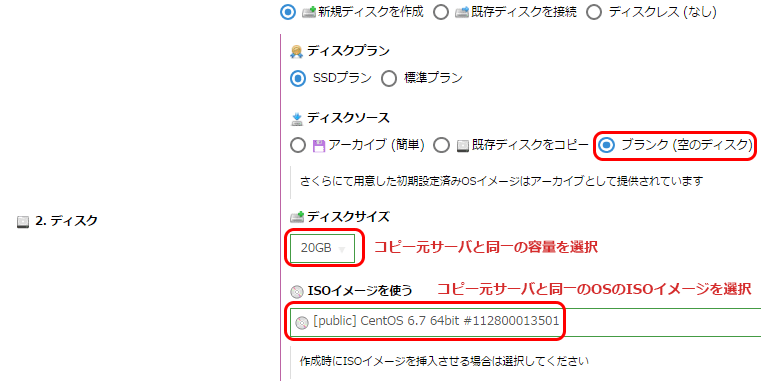
・コピー先アカウント上に、コピー元サーバと同一容量のブランク・ディスクを指定してサーバを作成します。CPUコア数やメモリ容量等のスペックはコピー元サーバと異なっていても構いません。本記事では、コピー元サーバはCentOS6.7を使用しており、コピー先サーバはCentOS6.7のISOイメージを使用して起動するものとします。
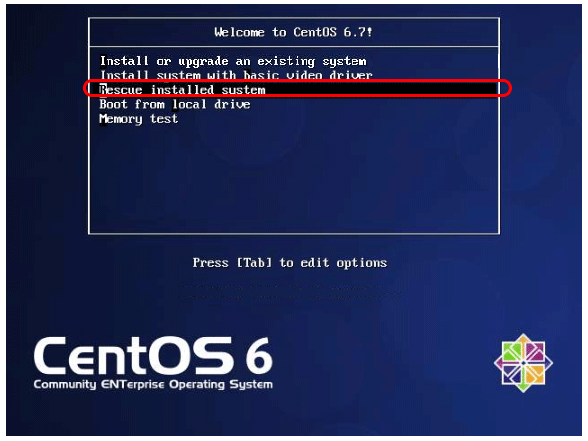
・コピー先サーバを作成し起動した後、コントロールパネルのサーバ詳細画面にて[コンソール]タブをクリックします。下記画面が表示されますので、[Rescue Installed System]を選択します。
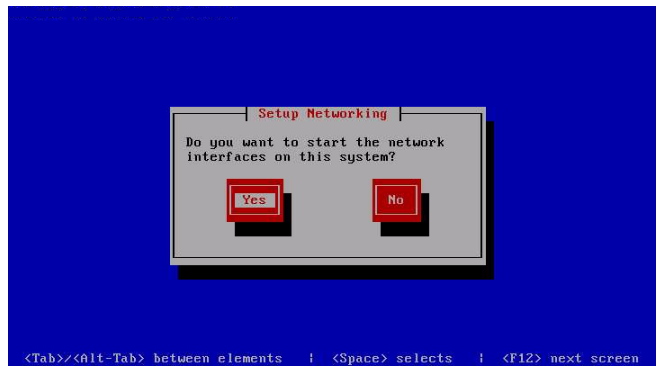
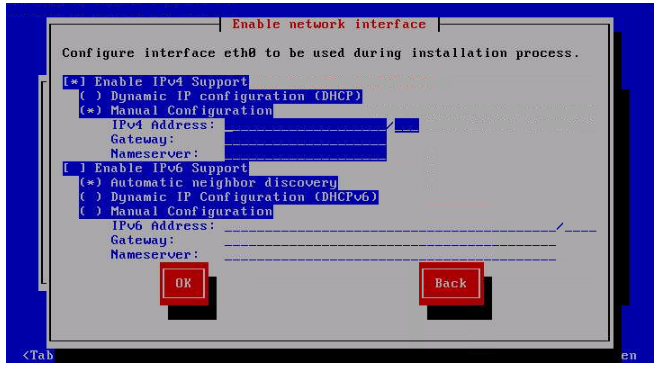
・ネットワークインターフェース設定を行うか選択する画面が表示されますので、[Yes]を選択し、Enterキーを押下します。
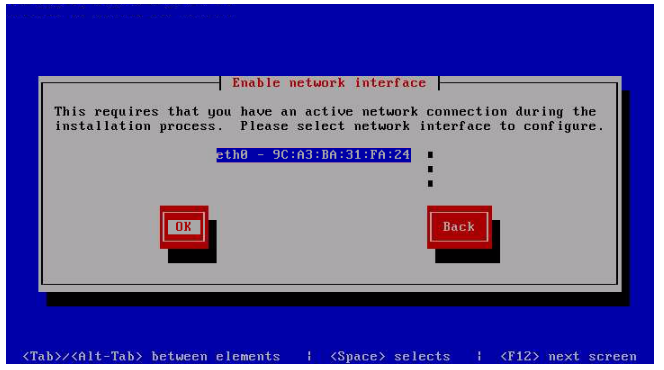
・インターフェース選択画面では[eth0]が表示されますので、[eth0]を選択し、[OK]へ移動しEnterキーを押下します。
・コピー先サーバに割り当てられたIPアドレス・プリフィックス・ゲートウェイ・ネームサーバを入力します。割当情報はサーバ詳細画面の[NIC]タブで確認できます。
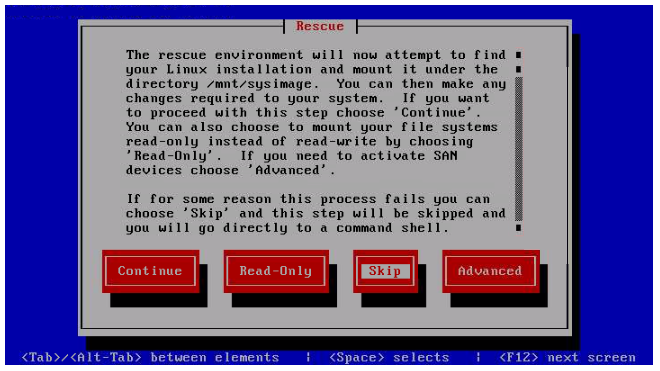
・ディスクマウントはSkipで結構です。[Skip]を選択し、Enterキーを押下します。
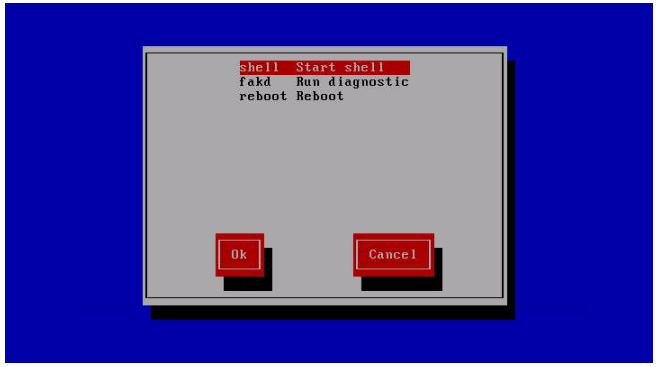
・この先の手順ではコマンドラインモードを使用します。「shell」を選択し、[OK]へ移動しEnterキーを押下します。
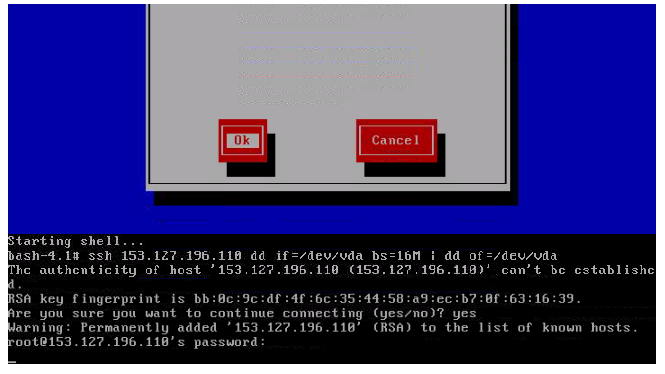
・以下のコマンドを入力し、コピー元サーバからコピー先サーバへディスクコピーを実行します。
# ssh <コピー元サーバのIPアドレス> dd if=/dev/vda bs=16M | dd of=/dev/vda
※このコマンドを実行するとコピー元サーバSSH、接続先サーバに設定された公開鍵のフィンガープリントが表示されるので、問題がなければ”yes”を入力します。
・コピーが完了したら、下記コマンドを入力し、サーバをシャットダウンします。
# poweroff
・コピー先サーバのサーバ詳細画面から操作し、ISOイメージを取り出します。
・左メニューの[ディスク]をクリックし、一覧からコピー先サーバのディスクを選択します。
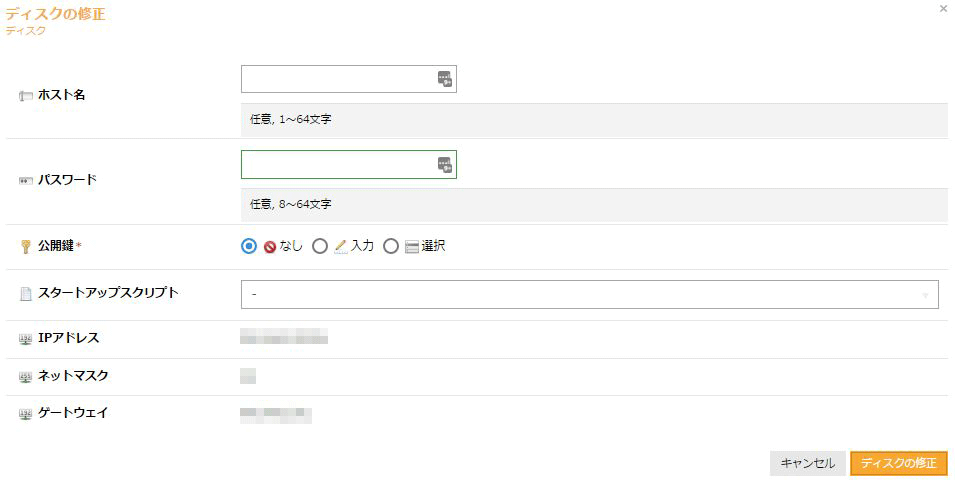
・[ディスクの修正]をクリックします。

・[ディスク修正]をクリックし、コピー先サーバのIPアドレスに書き換えます。
・左メニューの[サーバ]をクリックし、コピー先サーバを選択して起動します。
アカウント間でのサーバコピーの手順は以上です。